
Frothed milk is essential to many tea lattes and espresso based drinks. While the tea is steeping or the coffee is brewing, you can create barista-quality frothed milk without any special equipment. This step-by-step guide will teach you how to froth milk at home with an inexpensive handheld frother.
I make a lot of tea lattes at home for myself and my blog. So, I’m often asked how I froth milk for these recipes. It might surprise some to learn that I don’t have any fancy frothing equipment.
Instead, I have been using an inexpensive handheld frother that I have had for several years! Aside from having to replace or charge the batteries occasionally, my handheld frother has never let me down.
However, I didn’t always know how to use a handheld frother properly. So, I wanted to share some things I have learned over the years that may help others succeed with their handheld frothers.
Below are the tips that I use on a regular basis when I’m making London Fogs, Chamomile Tea Lattes, Matcha Lattes, Hojicha Lattes, Rooibos Lattes, Chai Latte and more!

What is Milk Frothing?
Frothing is the process of incorporating air into milk, creating a light and airy foam. The foam that forms can be used to top off a tea or coffee for a latte or cappuccino. It can also be used for hot chocolate.
Frothing milk can be done a few different ways but using a handheld frother is one of the most convenient and affordable options.
Frothed Milk vs. Steamed Milk
Frothed milk and steamed milk are different from one another. Steaming milk is typically done with a steam wand, not a frother.
Frothed milk creates a thick foam while steamed milk creates more of a microfoam as it has smaller air bubbles and a velvety texture.
What is a Handheld Frother?

A handheld frother is a small, battery-powered device that uses a whisk attachment to froth milk. As the name states, this device is to be held in your hands when using.
Unlike electric frothers, it does not heat milk while frothing so you need to heat your milk before using a handheld frother.
Handheld frothers can range in pricing as there are some with just an on/off butter and others that have buttons for various speeds. Also, handheld frothers can either be equipped with a rechargeable battery with a USB port or require AA batteries.
Handheld Frother Pros
- Quick to use
- Easy to clean
- Travel friendly
- Compact (I love that it doesn’t take up much counter space like electric frothers or full machines!)
- Super affordable
Handheld Frother Cons
- Learning curve (but I’m here to help!)
How to Froth Milk with A Handheld Frother: A Step-by-Step Guide
Before frothing milk with a handheld frother, it is very important to make sure that the milk is cold and fresh. Warm milk won’t froth as well, and old milk won’t froth at all.
Note: I like to froth milk directly in the vessel I heated it in (a small saucepan, in this case). If you wish, you can transfer the heated milk to a tall heat-proof container before frothing though.

STEP 1:
Fill a small saucepan with cold milk, leaving enough room for the milk to expand as it froths.
The saucepan or any other container you are using to froth milk should be no more than half full to prevent spilling as milk is generally expected to double in volume with frothed properly. Thus, the saucepan/container will be full when the frothing process is over.
On medium-heat, heat the milk. Do not boil. The ideal temperature for milk frothing is between 140°F and 150°F. Anything hotter may scorch the milk and affect the taste and texture. The temperature will vary slightly depending on the type of milk you are using.
You can measure the temperature with a food thermometer the first few times. Over time you will get the hang of it and know when the milk is warm enough.
PRO TIP: Make sure there is enough milk in your saucepan. If your saucepan is too wide or you didn’t use enough milk, the handheld frother will not be submerged enough and therefore won’t aerate the milk properly.
The volume of milk will increase when frothing, but you need to start out with an appropriate amount for that to happen.

STEP 2:
Insert the frother into the milk, making sure that the whisk is fully submerged.
Turn on the frother and move it up, down and around in a circular motion, keeping the whisk fully submerged at all times. This will create a vortex in the milk, which will help to froth it evenly.
Continue frothing until the milk has doubled in volume and has a silky texture. This may take around 30-45 seconds. Be careful not to over-froth the milk, as it can become too thick and lose the ideal texture.
PRO TIP: If you are struggling to get a froth, the milk may not be hot enough or the batteries in your handheld frother need to be charged/changed.

STEP 3:
Once the milk is frothed to the desired consistency, turn off the frother and remove it from the milk. You should notice a nice soft peak of milk on the whisk of your frother.
Gently tap the saucepan or container on a flat surface. This will help remove any large bubbles remaining. Then swirl the milk to create a smooth, creamy texture.
Pour the frothed milk into your tea, coffee or other beverage of choice, using a spoon to hold back the foam. This will allow the warm milk underneath to pour out first. Then top your drink with the remaining milk foam.

The perfect milk froth will be light and airy but hold its shape on your latte or cappuccino. It should not deflate quickly.
It may take a few tries to get the hang of frothing milk with a handheld frother. Don’t give up!
Frequently Asked Questions
How much milk should I froth from just 1 serving/cup?
I like to froth 1/4 cup of milk for 1 cup. Since the milk will almost double in volume when frothed, then about half a cup will be filled with the milk and the remaining is for your other ingredients (ie. tea).
How long should you froth milk with a handheld frother?
The length of time you should froth milk with a handheld frother depends on the desired texture. For a light and frothy texture, froth for about 15-20 seconds. For a thicker and creamier texture, froth for 30-40 seconds.

Is it possible to froth cold milk with a handheld frother?
Yes, it is possible to froth cold milk with a handheld frother however cold milk will not froth as well as warm milk.
A handheld frother can be used to create cold foam but typically a higher-fat content needs to be added (ie. heavy cream) to get the desired texture and it will take longer to achieve.
What is the difference between frothing milk with a handheld frother and an electric frother?
The main difference between frothing milk with a handheld frother and an electric frother is the amount of control and speed.
A handheld frother requires more effort and time to achieve the desired texture, while an electric frother can froth milk more quickly and efficiently.
At what temperature should you heat milk before frothing with a handheld frother?
The ideal temperature for heating milk before frothing with a handheld frother is between 140-160°F (60-71°C). This temperature range allows the milk to froth easily. Do not overheat the milk, as it can affect the frothing process and taste.
Can I froth any type of milk?
You can, but you should note that the results will differ as different types of milk can affect the frothing process.
For example, skim milk has a low fat content so it will produce a thinner foam. Soy milk requires more air to create foam, but produces a creamy texture. In my experience, oat milk froths the easiest for a dairy-free option.
The higher fat content in a milk will be best at creating a rich and creamy texture when frothing. It will also be the fastest to froth. That’s why dairy milk, like whole milk, is a common choice.
Best Handheld Milk Frothers
*Note: The list below contains affiliate links. Clicking these links won’t cost you anything extra. Any commission earned goes toward providing original content for The Cup of Life.

Zulay Powerful Milk Frother Handheld
This is a basic handheld frother that comes in a variety of colours. It is powered by AA batteries and comes with a stand for easy and clean storing. It only has one speed, but is pretty powerful. This is very similar to the first handheld frother I owned.
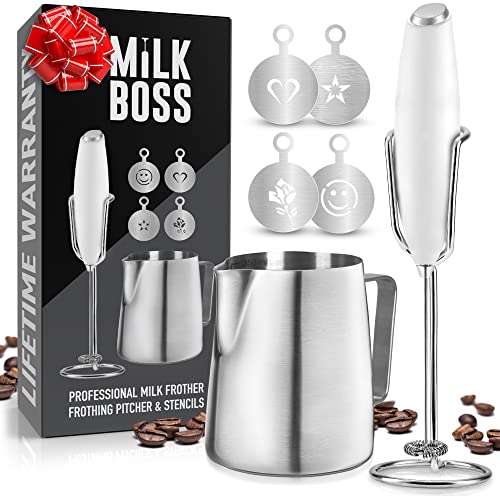
Milk Boss Milk Frother
This handheld milk frother is similar to the one above however it also includes a frothing pitcher and latte art stencils.

Milk Frother Handheld USB-Rechargeable
This handheld milk frother is very similar to the one I currently use. It has 3 speeds and 2 attachments -- one is for frothing and the other is for whisking. It also has a built-in rechargeable battery.
Save this how to froth milk article so you will have easy access to these frothing tips later. Click here and pin it!

Do you have additional milk frothing tips? If so, please share them in the comments below!
I’m a little confused. You initially stated that the milk needs to be cold, but later say to heat to a specific temperature. I been trying for weeks to froth oatmilk and it’s just not right.
Hi Katrina, I’m sorry for the confusion! I meant that when heating you should start with cold + fresh milk for best results, not milk that may be close to best before date or was out of the fridge for a bit. Are you using refrigerated or shelf-stable oat milk? I find shelf-stable oat milk doesn’t froth well but some refrigerated oat milks do. There are definitely some brands that froth better than others though with the handheld frother, it typically depends on the fat content. If you’re still having trouble frothing oat milk it may be worth looking into barista-style oat milk as it contains more fat to get the frothy texture. I hope this helps!
Detailed, encoraging instructions. Instant level up for my drink station! Thank you, thank you, thank you! I think I’ll try frothing half&half for cold drinks.
What is a good vessel for frothing milk? Your article shows a carafe-like container vs a pot – can you recommend a particular carafe?
Hi Janice, the vessel I used in the photos of this article is a turkish coffee pot for the stovetop. But, you can also use a small pot to froth milk on the stovetop with a handheld frother. I use a small pot when I don’t have this one on hand and get similar results.